Dataset Type: a CSV file containing messages from Twitter
Step 1: Download the practice dataset to your computer: ExploreCanada.csv
Step 2: Login to https://netlytic.org with your Google or Yahoo ID (or create a “standard” account)

Step 3: Import the sample dataset from Step 1 as ‘Text File’. First click add new dataset, select the Text file tab and then upload the file to Netlyic. Don’t forget to give your dataset a name.

The next screen will show you whether the dataset has been imported properly.

Step 4: Click “Next” and then go to the “4. Network Analysis” tab, find the “Name Network” section and select the dataset type as “Twitter” from the drop down menu, then click the “# Remaining Posts” button to analyze the dataset.

Step 5: Once the network is built, click on the “Visualize” button

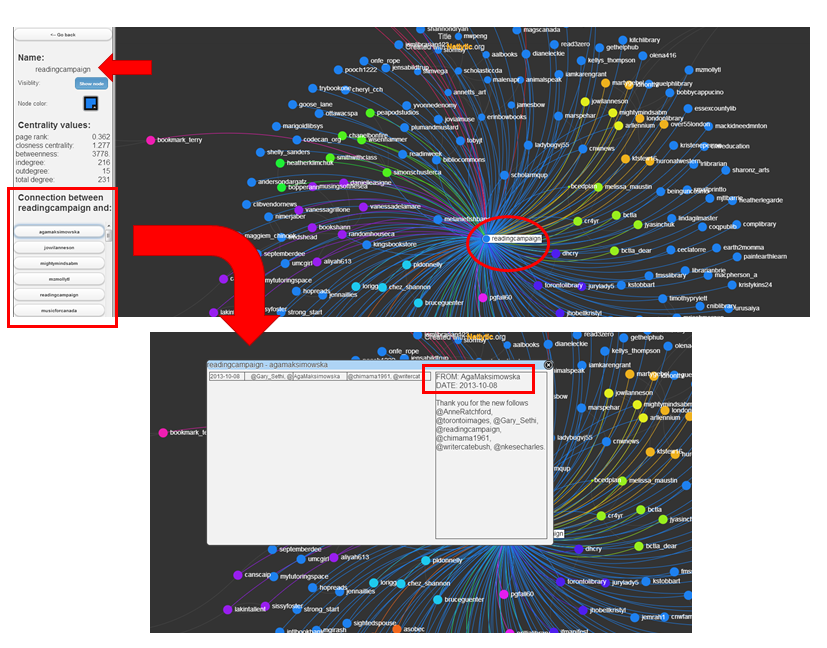
Step 6: Review some of the most connected members of the network, as indicated by the larger node size, and then read some of the messages exchanged among Twitter users to understand the formation of connections among them.
To access individual tweets, click on the node/person in question and then click on any of the connecting nodes/names listed in the left pane.
Step 7. Annotate 3-5 areas and/or clusters in the network by using the Notes feature.
To label and annotate information about the various cluster and individual in the network visualization, use of the yellow “Sticky Notes” feature. To activate this feature, click the yellow box containing a plus sign located in the bottom right hand corner of the network visualization window. This feature allows you, the researcher, to label and annotate information about the network.
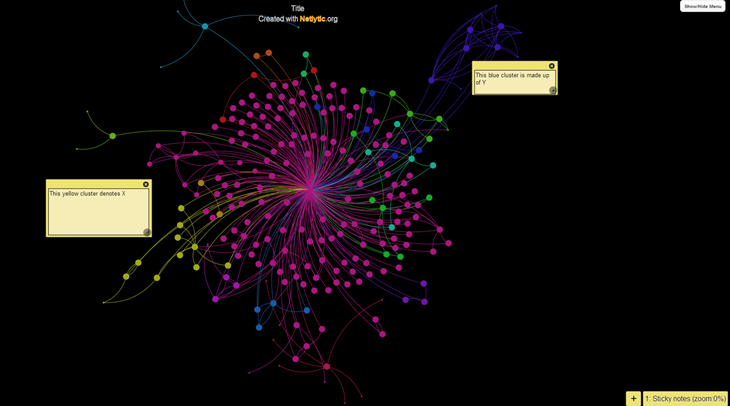
As you add sticky notes to the network visualization, they will appear at the bottom lower right hand corner of the network visualization screen along with information about the zoom level associated with each note.(e.g. 0%, 25%, 50%, etc.)
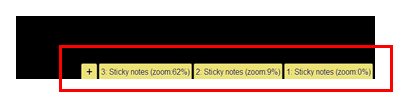
To capture a snapshot of your network and any sticky notes about your network, click on the “Save Image” button in the left pane. You can only save and publicly share up to three snapshots at a time in the system. If you want to take and save additional snapshots of your network, you will need to save them to your computer first and delete them from the system to make room for new snapshots of your network.